Let’s now capture the Tenant in our code. Here I will be using the domain name of the web site the app runs on to determine who the Tenant is. Normally you would capture domains names like “customerA.apothecaric.com” and “customerB.apothecaric.com” and you then determine which Tenant the user belongs to.
Set Up Data For Development
In our immediate case we are running the Api locally so I will go insert a Tenant for our use. I will also add the new Tenant’s Id to the user that we created earlier using the temporary “Register” Api endpoint.
1
2
3
4
5
6
7
8
9
10
11
12
13
14
15
16
17
18
19
20
21
22
USE ApothecaricAuthentication;

BEGIN
  IF NOT EXISTS (SELECT 1 FROM AspNetTenants WHERE Id = 'ad97db01-e024-45e5-8f06-f299b4fac58a')
  BEGIN
    INSERT INTO AspNetTenants
        (Id, Code, DomainName, IsDefault, [Name])
    VALUES
        ('ad97db01-e024-45e5-8f06-f299b4fac58a', 'LOCAL', 'localhost', 1, 'Local Host');
  END
END


BEGIN
  IF EXISTS (SELECT 1 FROM AspNetUsers WHERE Email = 'eric@yahoo.com')
  BEGIN
    UPDATE AspNetUsers
      SET
        TenantId = 'ad97db01-e024-45e5-8f06-f299b4fac58a'
      WHERE Email = 'eric@yahoo.com';
  END
END
Now we have a Tenant in our database and a user that is tied to that Tenant.
On To The Code
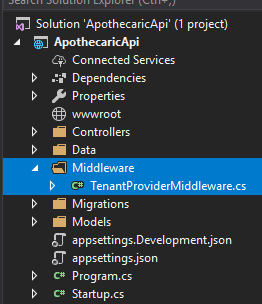
Now it’s time to write some .Net Core middleware. I have added a folder called “Middleware” and a class in that new folder called “TenantProviderMiddleware”.
Set Up A Middleware Class
In the TenantProviderMiddleware class, add the following boilerplate code for a middleware component.
1
2
3
4
5
6
private readonly RequestDelegate next;

public TenantProviderMiddleware(RequestDelegate next)
{
  this.next = next;
}
Next we need to add the Invoke method:
1
public Task Invoke(HttpContext httpContext, ApothecaricDbContext dbContext)
Here notice that I have also added our DbContext to be injected in so that we can check the database for a proper Tenant.
Inside the Invoke method, let’s first add
1
string urlHost = httpContext.Request.Host.ToString();
to grab the Host (Domain Name) from the Http Request.
Next, let’s check that we did, in fact, get a domain name from the Http Request.
1
2
3
4
if (string.IsNullOrEmpty(urlHost))
{
  throw new ApplicationException("urlHost must be specified");
}
If we do get a domain name, I want to make sure to strip out any port numbers if they are present
1
urlHost = urlHost.Remove(urlHost.IndexOf(":"), urlHost.Length - urlHost.IndexOf(":")).ToLower().Trim();
Now that we have a good domain name (host), let’s hit the database with our new information and see if we have a registered Tenant with that same domain name.
1
Tenant tenant = dbContext.Tenants.FirstOrDefault(a => a.DomainName.ToLower() == urlHost);
Here is a check on the Tenant object. If we don’t have one, I want to throw an error. This request should not be made to our system without a Tenant…and that’s final!!
1
2
3
4
5
if (tenant == null)
{
    throw new ApplicationException("tenant not found based on URL.");

}
The last bit is to add to the HttpContext’s Items key/value pairs. I have added the key “TENANT” with the value of the Tenant object that we grabbed from the database.
1
2
3
httpContext.Items.Add("TENANT", tenant);

return next(httpContext);
Last, we end the middleware and pass control to back to the app or the next registered middleware.
Here is the whole class listing:
1
2
3
4
5
6
7
8
9
10
11
12
13
14
15
16
17
18
19
20
21
22
23
24
25
26
27
28
29
30
31
public class TenantProviderMiddleware
{
  private readonly RequestDelegate next;

  public TenantProviderMiddleware(RequestDelegate next)
  {
    this.next = next;
  }

  public Task Invoke(HttpContext httpContext, ApothecaricDbContext dbContext)
  {
    string urlHost = httpContext.Request.Host.ToString();

    if (string.IsNullOrEmpty(urlHost))
    {
      throw new ApplicationException("urlHost must be specified");
    }

    urlHost = urlHost.Remove(urlHost.IndexOf(":"), urlHost.Length - urlHost.IndexOf(":")).ToLower().Trim();

    Tenant tenant = dbContext.Tenants.FirstOrDefault(a => a.DomainName.ToLower() == urlHost);

    if (tenant == null)
    {
      throw new ApplicationException("tenant not found based on URL, no default found");
    }

    httpContext.Items.Add("TENANT", tenant);

    return next(httpContext);
}
Register The Custom Middleware
We now must register our middleware with the application in order to run the code on http requests. So back again to the Configure method of the Startup class.
We need to add the line:
1
app.UseMiddleware<TenantProviderMiddleware>();
1
2
3
4
5
6
7
8
9
10
11
12
13
14
// This method gets called by the runtime. Use this method to configure the HTTP request pipeline.
public void Configure(IApplicationBuilder app, IHostingEnvironment env)
{
  if (env.IsDevelopment())
  {
    app.UseDeveloperExceptionPage();
  }

  app.UseMiddleware<TenantProviderMiddleware>();

  app.UseAuthentication();

  app.UseMvc();
}
Update Custom User
We then need to revisit our ApothecaricUser class and add a couple of items. We need to add the TenantId column that the Migration so graciously created for us in the database. We also need to add the Tenant object that the user will belong to.
1
2
3
4
5
6
7
8
9
10
11
12
13
14
15
16
public class ApothecaricUser : IdentityUser
{
  [StringLength(250)]
  public string FirstName { get; set; }

  [StringLength(250)]
  public string LastName { get; set; }

  public bool IsActive { get; set; }

  [StringLength(450)]
  public string TenantId { get; set; }

  public virtual Tenant Tenant { get; set; }

}
But How Will We Use It?
When a request comes into our controllers, I would like to grab the Tenant. On the CreateToken method that we created in the last post, remember that we make 2 calls to the Asp.Net Identity database to authenticate the user.
1
var user = await userManager.FindByNameAsync(login.Email);
and
1
var result = await signinManager.CheckPasswordSignInAsync(user, login.Password, false);
I want to change the first one. I would like to check that the user exits by the user’s name AND by the Tenant the the user should belong to. How about a FindByNameAndTenantAsyc call. But wait, that doesn’t exist in Asp.Net Core’s UserManager. How would we do this?
Create Our Own UserManager Of Course!
In the Data folder, I created a new ApothecaricUserManager class.
When creating our new Custom UserManager, we need to inherit from Core’s UserManager and also create the proper constructor for our new class.
1
2
3
4
5
6
7
8
9
public class ApothecaricUserManager : UserManager<ApothecaricUser>
{
  public ApothecaricUserManager(IUserStore<ApothecaricUser> store, IOptions<IdentityOptions> optionsAccessor,
IPasswordHasher<ApothecaricUser> passwordHasher, IEnumerable<IUserValidator<ApothecaricUser>> userValidators,
IEnumerable<IPasswordValidator<ApothecaricUser>> passwordValidators, ILookupNormalizer keyNormalizer,
IdentityErrorDescriber errors, IServiceProvider services, ILogger<UserManager<ApothecaricUser>> logger)
: base(store, optionsAccessor, passwordHasher, userValidators, passwordValidators, keyNormalizer, errors, services, logger) { }

}
One helluva constructor, no?!
Now we just need to add one more method here to get at a User and their Tenant. Here is that method:
1
2
3
4
public virtual Task<ApothecaricUser> FindByNameAndTenantAsync(string userName, string tenantId)
{
  return Task.FromResult(base.Users.Where(u => u.NormalizedUserName == userName.ToUpper().Trim() && u.TenantId == tenantId).SingleOrDefault());
}
In keeping with the constructs, I will keep this method asynchronous. The NormalizedUserName is just the user’s email that is all uppercase. Makes for easier comparisons. And here, we also check for the Tenant by using the Tenant’s Id that we captured in the middleware.
Register, Register
We then need to go back (again!) to our Startup class and register our new ApothecaricUserManger with the Identity middleware. Find our AddIentity call in the ConfigureServices method and add on the AddUserManger registration.
1
2
3
4
5
6
services.AddIdentity<ApothecaricUser, IdentityRole>(cfg =>
{
    cfg.User.RequireUniqueEmail = true;
})
.AddEntityFrameworkStores<ApothecaricDbContext>()
.AddUserManager<ApothecaricUserManager>();
Use It In The Controller
In our AccountController, change the:
1
private readonly UserManager<ApothecaricUser> userManager;
to
1
private readonly ApothecaricUserManager userManager;
And the constructor to signature to:
1
2
public AccountController(IConfiguration configuration, ApothecaricUserManager userManager,
SignInManager<ApothecaricUser> signinManager)
and last, the call to:
1
var user = await userManager.FindByNameAsync(login.Email);
should now be:
1
var user = await userManager.FindByNameAndTenantAsync(login.Email, ??????);
But Wait A Minute!!!
Where are we going to get that Tenant information from? I know the middleware grabbed it and put it in the HttpContext’s Items key/value parings….but how do access that?
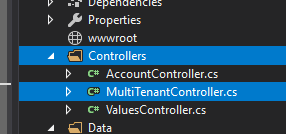
The last step here is to create a base Controller class and have our Controller’s inherit from a new MultiTenantController instead of the built-in Controller class. Create a new controller named “MultiTenantController” and add that to the Controllers folder.
Make sure the controller inherits from the base Controller class.
1
public class MultiTenantController : Controller
This new controller will just have a Property in it. That’s it. The property is…..
You guessed it! Tenant!
1
2
3
4
5
6
7
8
9
10
11
12
13
14
15
public class MultiTenantController : Controller
{
  public Tenant Tenant
  {
    get
    {
      object multiTenant;

      if (!HttpContext.Items.TryGetValue("TENANT", out multiTenant))
        throw new ApplicationException("Could not find tenant.");

      return (Tenant)multiTenant;
    }
  }
}
Here we grab that Tenant from the HttpContext’s Items list that our middleware placed there for us. How nice!
Now go back in inherit the AccountController from MultiTenantController instead of just Controller.
Now magically change:
1
var user = await userManager.FindByNameAndTenantAsync(login.Email, ??????);
to this:
1
var user = await userManager.FindByNameAndTenantAsync(login.Email, Tenant.Id);
Try It Out!
Open Postman again and try the Token call. This time you are both making sure the user is in your system but also that the user is coming from the correct Tenant they are assigned to. This way you can use the same app for all your customers and, the same database if you wish and keep the data separated for each Tenant using your application.
Next Steps
Next time I would like to add some Validation Filtering to your endpoints to make sure the data coming into our endpoints is exactly what we are expecting.
Hope to see you then!


