This article is a continuation of the customized Asp.Net Identity database that was created in previous posts.
Create The Project
Start by creating a SQL Server Database Project. To go along with the scenario we set up for creating our database in the first place, I have chosen to name the project ApothecaricIdentityDatatbase.
With this project we will be able to maintain our identity database much easier.
Import Database
The next steps will outline importing the database we created in our previous posts and bring that database into our project.
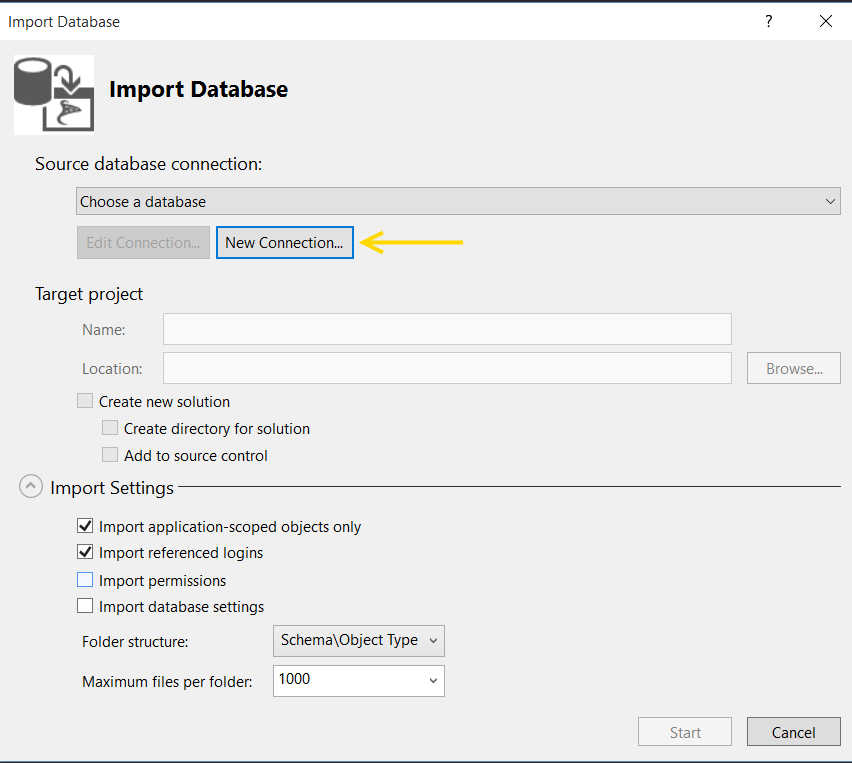
First let’s grab our Import Database menu to kick things off.
Next let’s set our database connection. Hit the New Connection… button to open up our connection dialog box.
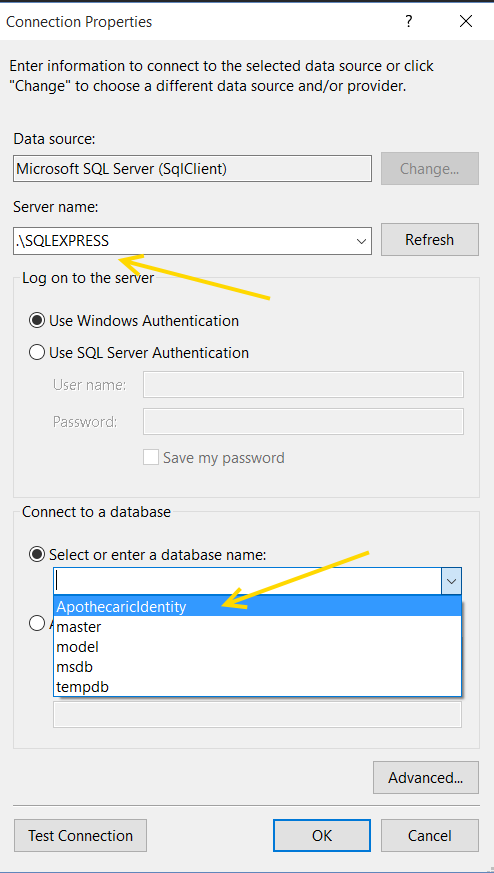
If you also remember from our earlier post, we wanted to house the database on a SQL Express instance and not in the mdf file that is usually created by Asp.Identity in the App_Data folder of our MVC application.
Find the local SQL Server Express instance and find the database we created earlier. Here I have found ApothecaricIdentity.
Import Settings
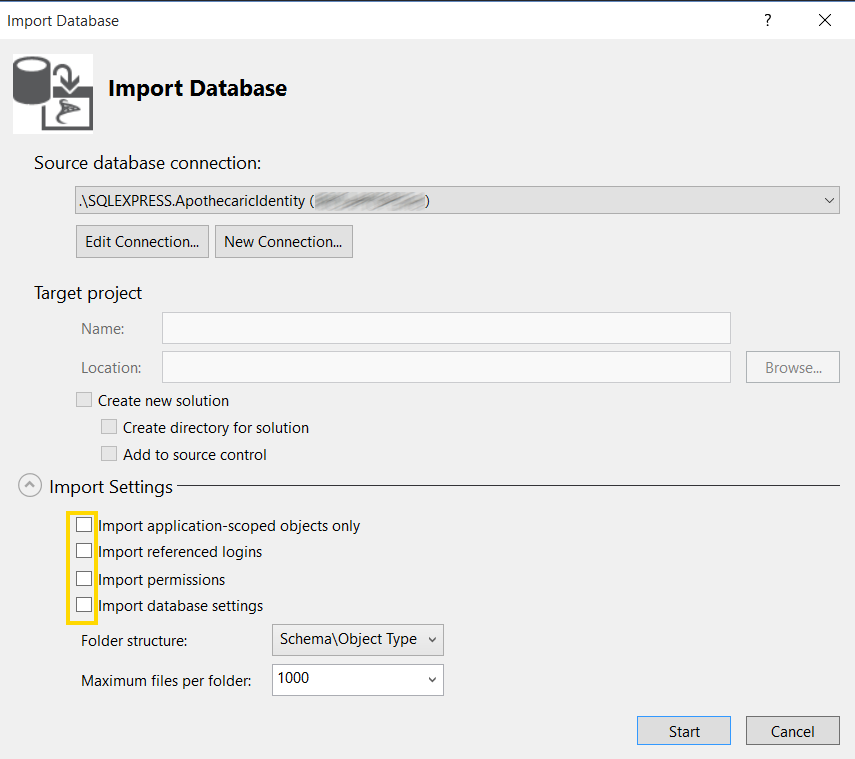
For now, I would deselect the Import Settings. Because we are, for the moment, using this database for development, we don’t need to bring in the system related items, logins, and permissions. When all looks good, hit the Start button.
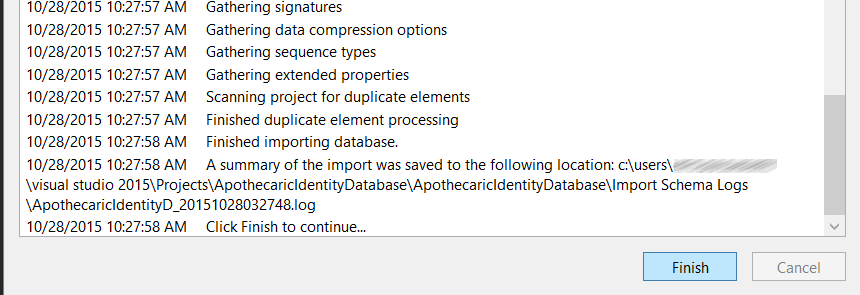
If the import process went off without a hitch, you should see the finish dialog. Hit finish to see the tables that our import process created.
Looks like our tables made it into the project.
Seed Data
Next I would like to add some seed data to our database. Right now I would like to add Roles to the system. I would like the system to have some default Roles already set up to get our system functional. I have initially decided on creating a Role called Admin, Consultant, and HiringManager. The Admin role would be used to create users, projects, and enter Hiring Managers. The Consultant would enter time in the system and be assigned Projects to book time against. The Hiring Mangers would be able to view hours charged against their projects and approve or reject the time entered by the Consultants.
In order to populate our Role table, we need to use a Post Deploy Script the the project will run after the main body of the project has completed its work.
Create the Post Deploy Script
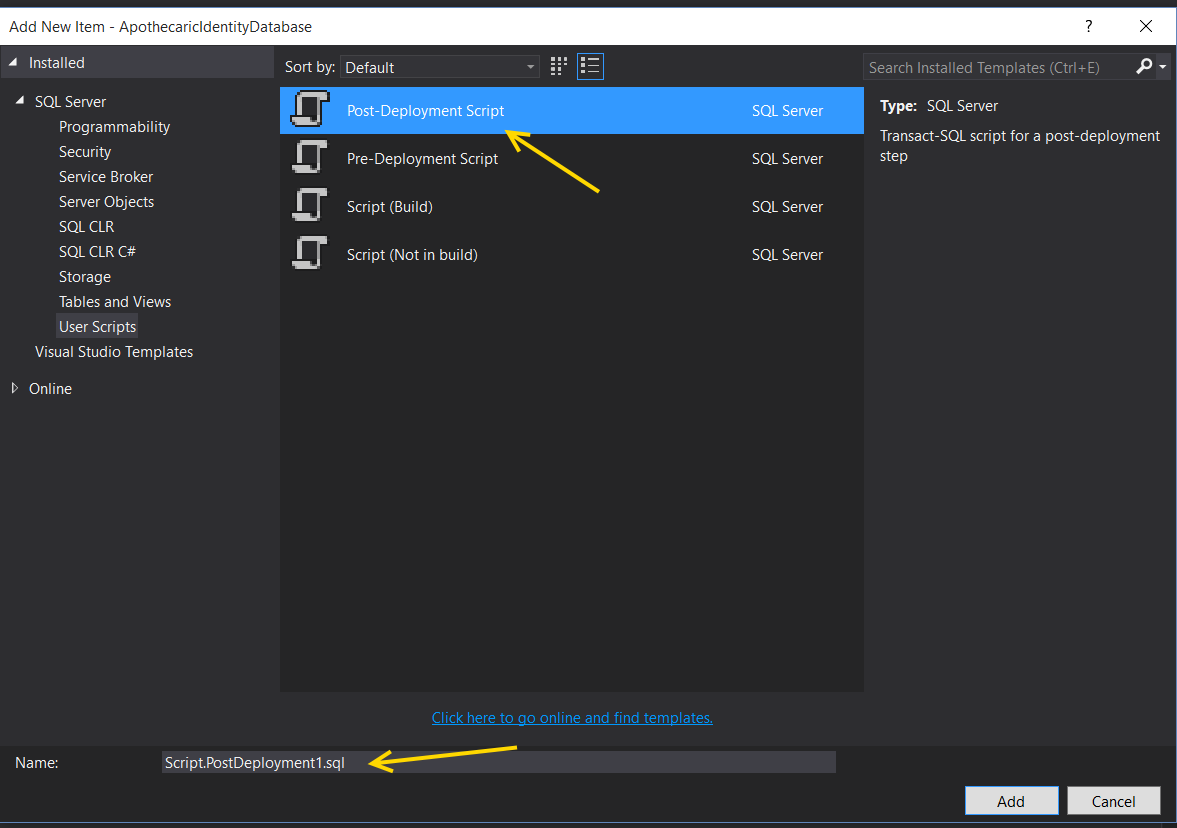
Let’s add the script file.
We can just keep the defaults for the name of our Post Deployment Script.
So in our Script.PostDeployment1.sql file, I will use a Merge statement to fill in our Role information. If you notice, we need to provide the GUID Ids for the AspNetRoles table. If you need information on using Merge Scripts, see here.
Publish The Database To The Server
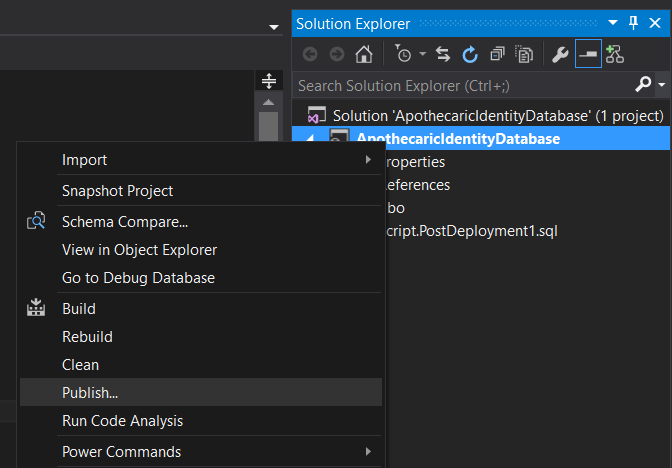
The last scaffolding piece would be the publish. Find the Publish menu option.
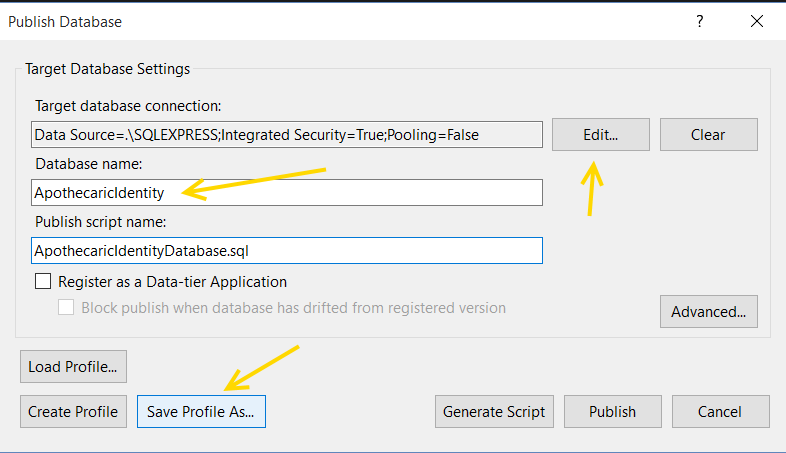
First hit the Edit… button and set our connection again to our Sql Server Express instance. I have since dropped my ApothecaricIdentity database. After we have our connection set, make sure our database name is set to what we want, and then I like to save this publish profile so that I can just run this again if I need to without having to set this all up again.
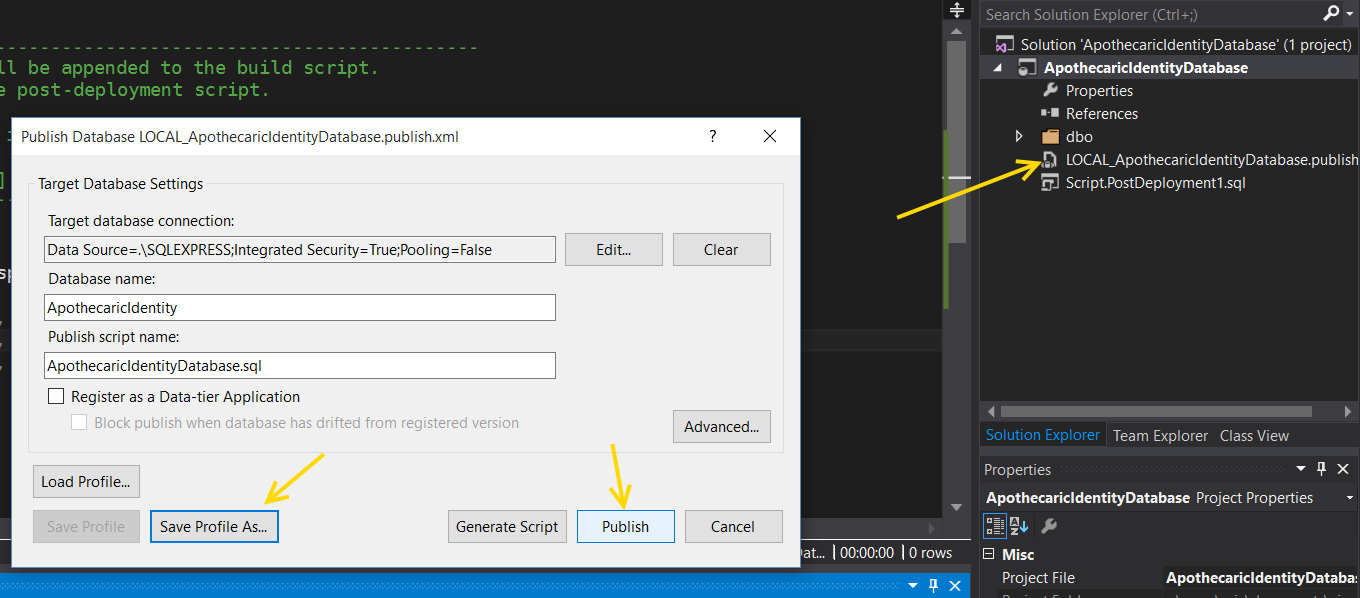
When I do the save profile, I just add the “LOCAL_” as a perfix to the default file name that the publish is suggesting. Later on, a publish file can be created for other servers, environments, etc.
Then let’s hit Publish.
And as usual, if all went well, we should see this success message in our output window.
Let’s see if this worked.
We can see that our database was created in our local Sql Server Express instance and all our tables are present.
If we look in the AspNetRoles table, we can see that our seed data is, in fact, there.
Having our Identity database in a Database Project will allow us to modify our database and republish with ease. We also now have a way to version control a database and have it nestled away in a source control system. Anything to help us sleep better.


