Add New Table
Now let’s add a whole new table. Let’s add an Applications table to house our application information. We will tie this table to our users in a later post. For now, let’s just get the new table in place.
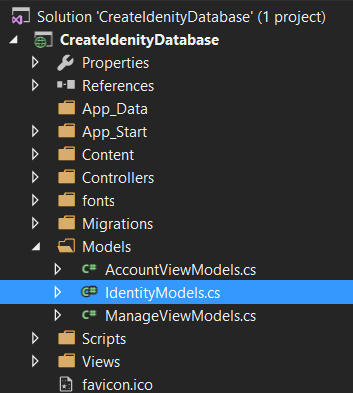
Let’s look back at our IdentityModels.cs file.
We need to add another using statement to our IdentityModels.cs file. Let’s add the Schema using statement now.
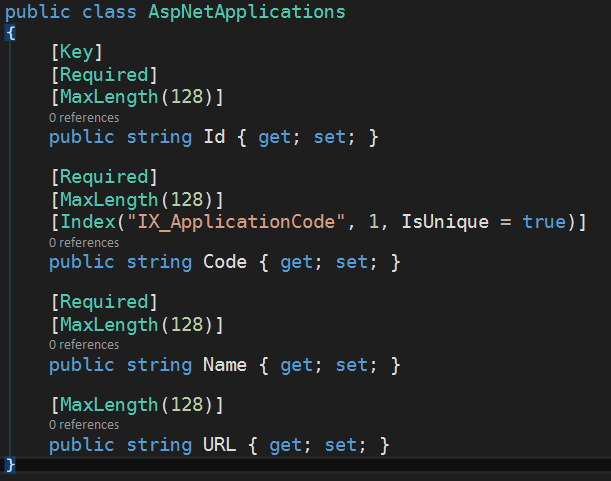
In this file, let’s create another class. We will call this class AspNetApplications. In keeping with the naming convention that Asp.Net Identity uses for the database tables, let’s use AspNetApplications for our new table name.
Let’s talk about the fields first. I have an Id that will end up being a nvarchar(128). In keeping with the other Id fields in the database, I will be putting in a GUID for the Id when adding new records to this table. The Code, I will use for creating the Claims on the user. We will place a Claim listing the Application Codes that the user has access to. That way, each application can check the user’s claims to see if they have the correct privileges to access the application.
The Name field should be pretty self-explanatory. And the URL….I was thinking we may be able to use this at some point. Maybe it can be a replacement for the Code…I am not sure….but it’s in here for now.
Data Annotations
Now let’s take a peek at the Data Annotations that we have set up. On the Id, I have set the [Key] annotation. This annotation will set the Id field as the primary key for my table. We have already discussed that the [Required] and [Maxlength()] annotations do. But what about [Index]? In this instance, I wanted to create the Code field with an index that would not allow entries to use the same code. We need to add a unique index on our Code field. I have also decided to name the index. You can also just signify the IsUnique attribute if brevity is more your thing.
Make sure our table gets built
Now we have to add our table to the dbContext so the Code First Migrations will build our table. Find the ApplicationDbContext class in our IdentityModels.cs file. We are going to add our new AspNetApplications class as a property to this Db Context class. Doing this will ensure that the Migration builds the AspNetApplications database table.


