Let’s Run Some EF Migrations Already!
Now we will run the EF Code First Migrations and build our database……Finally!!
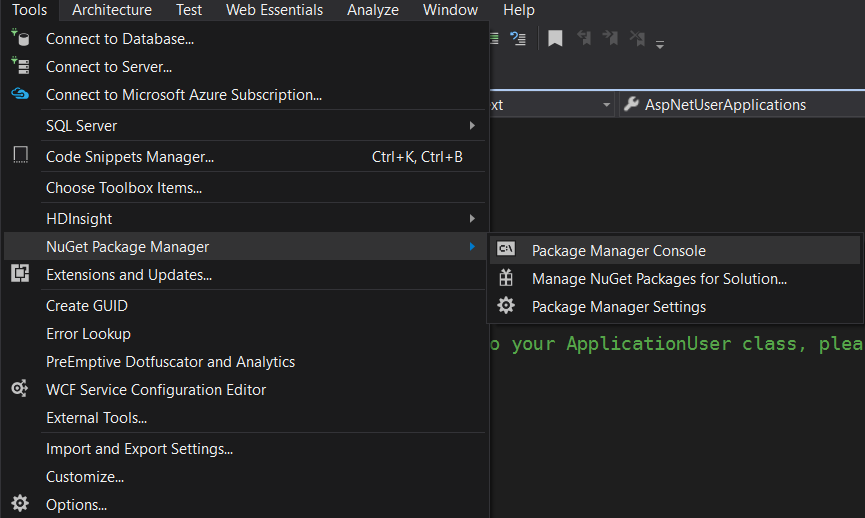
To run the migrations, we will need a the Nuget Package Manager Console.
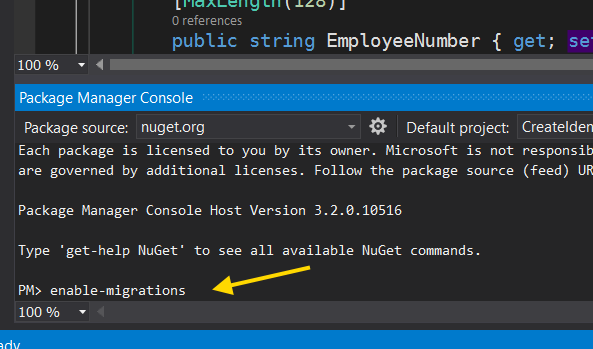
Now we will have to enable the Migrations. In the Package Manager Console, type in “enable-migrations”
And if all went well, you should see this:
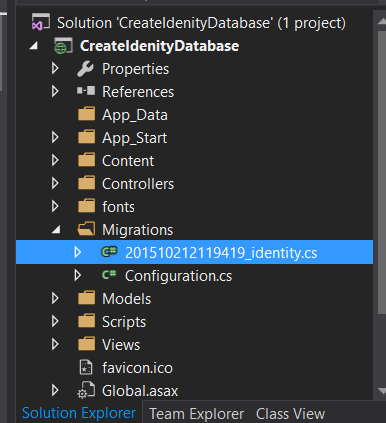
You should now see a “Migrations” directory in your Asp.Net MVC project with a Configuration.cs file in there.
The Configuration.cs file has a Seed method in it. You can use this to fill in tables with data when the database builds. I am going to move the database into a Database Visual Studio project later so I will not be using the Seed method here. I will populate the tables with the data I need in the db project (upcoming post).
Next, we need to Add the Migration to the project. You will need to type add-migration “identity” in the Package Manager Console now. The “identity” is the name you give the Migration you are adding to the project. I felt like calling it “identity”…so that is what it is.
If you see the yellow warning like I always do, just run the add command again. If successful, you will see that the Migration Scaffolding will be built for you. The Scaffolding will include a new file being added to your Migrations directory. The new file will be an xxxxxx_idenity.cs file. This file will be prefixed with the date you ran the “add-migration” command and some id. Mine looks like this:
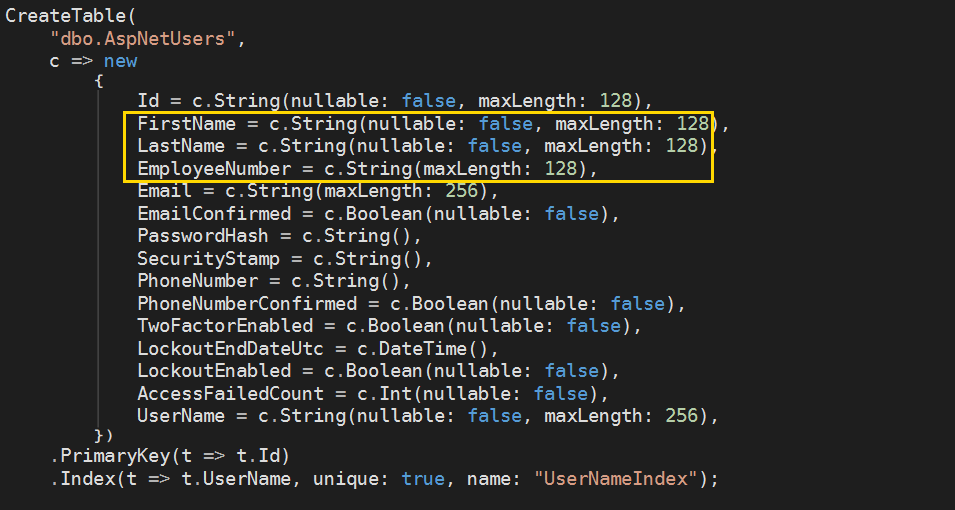
In this scaffolding file, we will see the calls to actually create the database tables. Here is the AspNetUsers table:
This is what is created from our ApplicationUser class. Notice that our new fields, FirstName, LastName, and EmployeeNumber have made it into this table creation.
Here are the AspNetApplications table and the AspNetUserApplications table that we created.
Notice our unique index on the AspNetApplicatons table and also our Foreign Keys that we created on our AspNetUserApplications table.
Create the database already!!!!
Ok, ok! To create the database, we need to type update-database into the Package Manager Console.
You can see that it applied the Migrations and then ran the Seed method.
If all went well, we will now have an Asp.Net Identity database that can now handle Users being given permissions to access explicit Applications!
Now to check if our hard work paid off! Into the database we go.
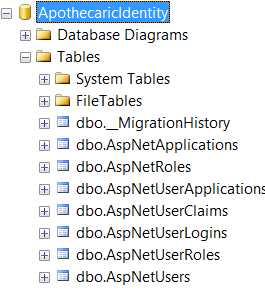
I can see our database, ApothecaricIdentity, that we wanted created. I also see our new tables along with the other tables that Asp.Net Identity creates.
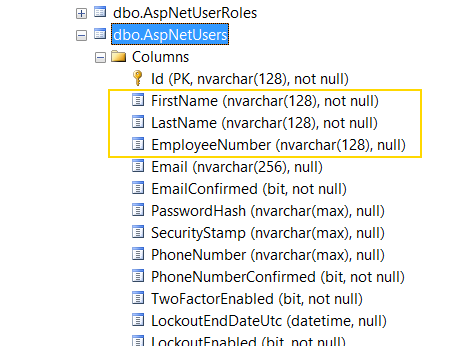
It looks like our custom fields made it into the AspNetUser table correctly.
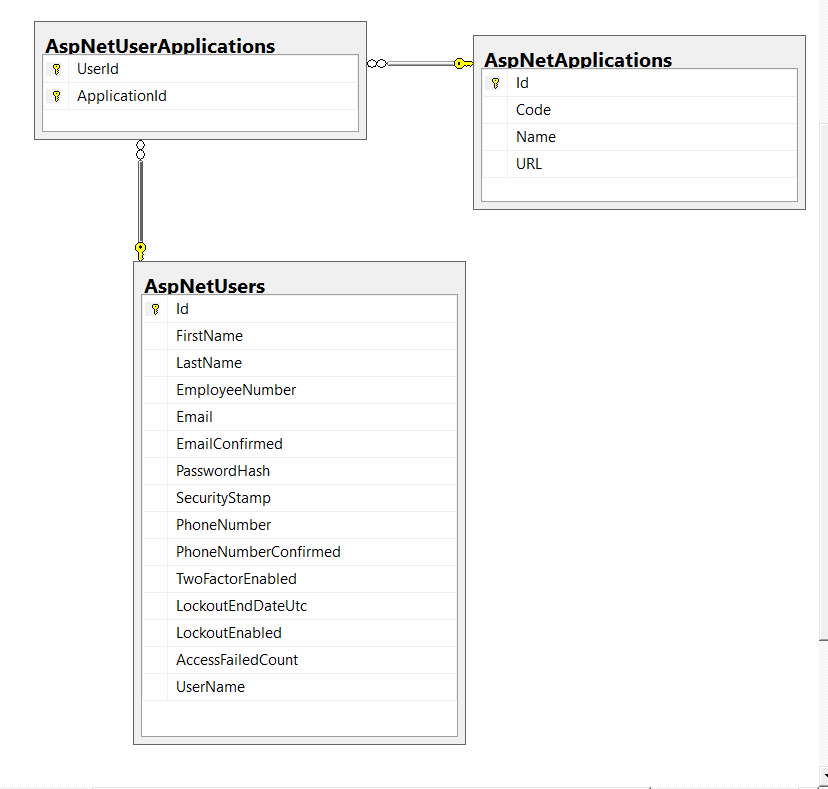
Looks like our custom “applications” tables are there and all our indexes and keys are all in place.
If we create a database diagram and put our new tables and the AspNetUsers table in it, we can see that our relationships are just what we would expect.
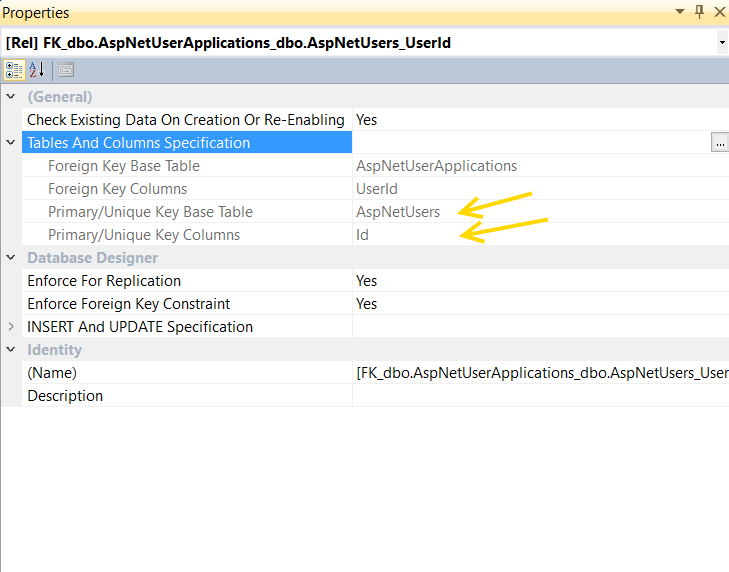
And last, just to check that the Foreign Keys are tied to the correct columns, I will peek at the properties for the Constraint on the AspNetUsers table. As you can see, the column that we expect, the Id column of the AspNetUsers table is now tied to the UserId column of the AspNetUserApplications table.
You can check the Foreign Key on the AspNetApplications table yourself. I’m tired.
In my next post, I will look at migrating our new Identity database into a Visual Studio Database project. From that project, we can add seed data, update tables when we need, and easily deploy and track versions of our database.
Cheers!

