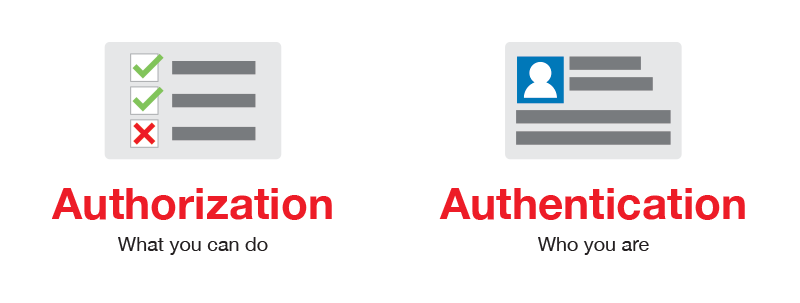
Let’s see how we “login” our user and make requests with Jwt tokens and have other endpoints protected from access without a valid token.
Start With The Configuration File
To set things up, lets add a few entries into our appsettings.json file. Let’s add some Token settings to the file.
1
2
3
4
5
6
7
"Tokens": {
  "Key": "a;lkjasdf;lkajsd;flkjas ;dflkja sd",
  "Issuer": "http://localhost:54172",
  "Audience": "http://localhost:54172",
  "ExpiryMinutes": "15",
  "ValidateLifetime": true
}
For our Tokens config, we want to set a Key. This “Key” is our secret for encrypting and decrypting the Jwt token. I would note that this is probably not the safest place to put this. If anyone gets a hold of this key, they can gain access by reading your token contents and manipulating them. Maybe in a later post I will explore moving this piece to an Azure Key Vault. For our Issuer and Audience, I will set these values to the domain that my development app is running under. As you probably guessed by seeing the port number, I am running this under IIS Express. The last couple of items sets the time, in minutes, that our token will be valid. ValidateLifetime will ensure the Asp.Net Core Identity will look at the “validFrom” and “validTo” and force validation.
Invoke Auth Middleware
In order to use Authentication and Authorization to protect our controller endpoints, we have to tell our app to use the Authentication middleware and have that added to our pipeline. Going back to our Startup.cs file and looking this time, at the Configure method. We need to add a call to “UseAuthentication”.
1
2
3
4
5
6
7
8
9
10
11
12
// This method gets called by the runtime. Use this method to configure the HTTP request pipeline.
public void Configure(IApplicationBuilder app, IHostingEnvironment env)
{
  if (env.IsDevelopment())
  {
    app.UseDeveloperExceptionPage();
  }

  app.UseAuthentication();

  app.UseMvc();
}
Out new entry on line 9 tells the app to use the Asp.Net Identity middleware. Easy enough.
Configure The Auth Services
Staying in our Startup.cs file, we need to look into our ConfigureServices method and add a few things there also.
1
2
3
4
5
6
7
8
9
10
11
12
13
14
15
16
17
18
19
20
21
22
23
24
25
26
27
28
29
30
31
32
33
34
35
36
37
38
// This method gets called by the runtime. Use this method to add services to the container.
public void ConfigureServices(IServiceCollection services)
{
  services.AddDbContext<ApothecaricDbContext>(options =>
        options.UseSqlServer(Configuration.GetConnectionString("AuthenticationConnection"),
        b => b.MigrationsAssembly("ApothecaricApi")));

  services.AddIdentity<ApothecaricUser, IdentityRole>(cfg =>
  {
    cfg.User.RequireUniqueEmail = true;
  })
  .AddEntityFrameworkStores<ApothecaricDbContext>();

  JwtSecurityTokenHandler.DefaultInboundClaimTypeMap.Clear(); // => remove default claims

  services
    .AddAuthentication(options =>
    {
      options.DefaultAuthenticateScheme = JwtBearerDefaults.AuthenticationScheme;
      options.DefaultScheme = JwtBearerDefaults.AuthenticationScheme;
      options.DefaultChallengeScheme = JwtBearerDefaults.AuthenticationScheme;

  })
  .AddJwtBearer(cfg =>
  {
      cfg.RequireHttpsMetadata = false;
      cfg.SaveToken = true;
      cfg.TokenValidationParameters = new TokenValidationParameters
     {
        ValidIssuer = Configuration["Tokens:Issuer"],
        ValidAudience = Configuration["Tokens:Issuer"],
        IssuerSigningKey = new     SymmetricSecurityKey(Encoding.UTF8.GetBytes(Configuration["Tokens:Key"])),
        ClockSkew = TimeSpan.Zero // remove delay of token when expire
     };
  });

  services.AddMvc();
}
We start at line 14 an clear out any default claims our app might have. We need to be adding ours from the config here during startup. Next we set the way we are going to do our authentication. In our case, we want to tell the middleware that we want to use Jwt tokens. That is what lines 19 – 21 are doing.
The next part in this method is telling the middleware about how are Jwt tokens will look and behave. We set our validation parameters here. The first item in here (RequireHttpsMetadata) is true by default. For development purposes, I have set this to false. We need to set our Issuer and Audience. The method will grab that information from our configuration file. We also need that key (secret) from our config to tell the middleware how to encrypt/decrypt our token.
Lockdown Our Test Controller Method
Let’s quick go back to our initially created ValuesController and lock that down from anonymous access. I have removed all of the endpoints except for the Get method. This is just for testing and I will remove this controller anyway once the demonstrations are complete. Here we just add the Authorize attribute to our endpoint and we will not be able to access it.
1
2
3
4
5
6
7
8
9
10
11
[Route("api/[controller]")]
public class ValuesController : Controller
{
  [HttpGet]
  [Authorize]
  public IEnumerable<string> Get()
  {
    return new string[] { "value1", "value2" };
  }

}
When we try to hit this endpoint now, we will get a 401 Unauthorized error code. This is just want we want…..for now…
Create The Login (CreateToken) Method
Back in our AccountController we need to add a new endpoint, but before we do that, let’s add a couple items to our Controller’s member variables. We need access to our configuration file and also the Asp.Net Core Identity’s SignInManager. The SignInManager helps us log into our application and assure that our incoming user is who they claim to be.
In the AccountController, add these two new member variables.
1
2
private readonly IConfiguration configuration;
private readonly SignInManager<ApothecaricUser> signinManager;
Here again, we need to tell the SignInManager what type our user is so we need to inject the type into the SignInManager so it knows how to interact with our custom user. And then go ahead and adjust the Controller’s constructor.
1
2
3
4
5
6
7
8
public AccountController(IConfiguration configuration,
                         UserManager<ApothecaricUser> userManager,
                         SignInManager<ApothecaricUser> signinManager)
{
  this.configuration = configuration;
  this.userManager = userManager;
  this.signinManager = signinManager;
}
After that is done, let’s look at our new CreateToken method and go through that.
1
2
3
4
5
6
7
8
9
10
11
12
13
14
15
16
17
18
19
20
21
22
23
24
25
26
27
28
29
30
31
32
33
34
35
[HttpPost]
[AllowAnonymous]
[Route("Token")]
public async Task<IActionResult> CreateToken([FromBody] LoginViewModel login)
{
  var user = await userManager.FindByNameAsync(login.Email);

  if (user != null)
  {
    var result = await signinManager.CheckPasswordSignInAsync(user, login.Password, false);

    if (result.Succeeded)
    {
      var key = new SymmetricSecurityKey(Encoding.UTF8.GetBytes(configuration["Tokens:Key"]));
      var creds = new SigningCredentials(key, SecurityAlgorithms.HmacSha256);
      var nowUtc = DateTime.Now.ToUniversalTime();
      var expires = nowUtc.AddMinutes(double.Parse(configuration["Tokens:ExpiryMinutes"])).ToUniversalTime();

      var token = new JwtSecurityToken(
      configuration["Tokens:Issuer"],
      configuration["Tokens:Audience"],
      null,
      expires: expires,
      signingCredentials: creds);

      var response = new JwtSecurityTokenHandler().WriteToken(token);

      return Ok(response);
    }

    return BadRequest();
  }

  return BadRequest();
}
In line 4, we are expecting our LoginViewModel object that we created in an earlier post. For now, this just has a user name (email) and password. In line 6 we call the UserManager to get our user object from the database. If the UserManager finds our user, we want to use that user object, along with the incoming password and try to authenticate our user. If we are successful, we move on to create the Jwt token. Lines 14-24 outline how we create our Jwt Token (or Auth Token). We need to grab the key (secret) from our config file in line 14 and then create signing credentials that will encrypt our token when we write it out. This is happening on line 15. On line 17 we set the time that our Auth Token should expire. In lines 19-24 we create our Jwt Token object by sending in our config information and signing credentials. In our example, I have left out claims since we don’t have any yet. I may cover that part in a later post.
When we have our JwtSecurityToken built, we write it out all nice and encrypted. At this point, we can return that token to the client.
Try it out
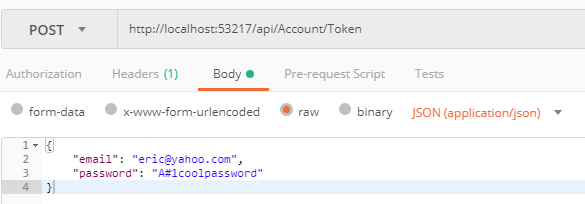
Back to Postman, let’s create a new Post call to our new CreateToken endpoint. Remember that, in my code, I chose the “Token” for the route, so my call looks like this:
When we invoke that, we should get a return that looks something like this:
That big string of letters and numbers is our token…all encrypted up.
Use The Token Already!
So, lets go back and make that call to our ValuesController’s Get method. This time however, we will add our token to the header of our request.
In Postman, let’s add an Authorization key to our http request. The value of our Authorization header will be our token. Because our token is a Jwt Bearer token, which means the bearer of this token can be authorized, we need to add the word “bearer” before our token value. Type in “bearer”, then a space, and then paste in the token text that we received from our Token call.
If all goes right, you should see the generic Value return from our call. You have been Authenticated and the Authorized to access our locked-down Api! Pretty great!
Next Steps
Next I would like to tweak our Authentication “Token” request to take a Tenant into account and add our custom middleware to access the Tenant and make that part of our interaction with the Identity system and our data Api’s.
Hope to see you then!


