

So you are now Authenticating your user and providing Authorization via the Jwt (Auth) token. Now you don’t want your Auth tokens to live for really long periods of time, and you certainly don’t want your users having to re-login to your app every 30 minutes. But for safety, how do we get around this?
Refresh Tokens
A refresh token is a token that does not expire, however, it can be blacklisted by an Administrator of your system. This token must also be stored and stored securely. Any access to your refresh tokens in their store can allow to continue to create Auth tokens. You should always have a way to blacklist or remove the refresh token from its store.
We will start by creating a new RefreshToken class and subsequently add that to our Db Context and Migrate that to our database.
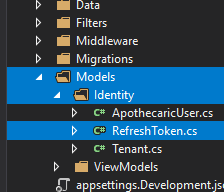
Let’s take a look at our RefreshToken class:
1
2
3
4
5
6
7
8
9
10
11
12
13
14
15
16
17
18
19
20
21
[Table("AspNetRefreshTokens")]
public class RefreshToken
{
  [Key]
  [StringLength(450)]
  public string Id { get; set; }

  public DateTime IssuedUtc { get; set; }

  public DateTime ExpiresUtc { get; set; }

  [Required]
  [StringLength(450)]
  public string Token { get; set; }

  [StringLength(450)]
  public string UserId { get; set; }

  [ForeignKey("UserId")]
  public ApothecaricUser User { get; set; }
}
First we set the name of the table that EF will create. I have kept with the convention and named my table “AspNetRefreshTokens”. Next, the Id as the Primary Key. Again, I will be using a GUID here to keep with the other Asp.Net Identity tables. In this table we also need to track when the token was issued and when the token expires. The Token field holds our token. The token is usually just made up of a GUID also. I get just a bit fancier and do a couple of extra things with it. Last, we tie our RefreshToken back to a User. After a User has been Authenticated and an initial Auth Token has been issues, User must also have a refresh token in this table to be able to get a new Auth Token from our refresh process.
Get The Table Ready
1
2
3
4
5
6
7
8
9
10
11
12
13
14
15
16
17
18
19
20
21
22
23
24
25
26
27
28
29
public class ApothecaricDbContext : IdentityDbContext<ApothecaricUser>
{
  public ApothecaricDbContext(DbContextOptions options) : base(options) { }

  public DbSet<Tenant> Tenants { get; set; }

  public DbSet<RefreshToken> RefreshTokens { get; set; }

  protected override void OnModelCreating(ModelBuilder builder)
  {
    builder.Entity<Tenant>()
      .HasIndex(u => u.Code)
      .IsUnique();

    builder.Entity<Tenant>()
      .HasIndex(u => u.DomainName)
      .IsUnique();

    builder.Entity<RefreshToken>()
      .HasAlternateKey(c => c.UserId)
      .HasName("refreshToken_UserId");

    builder.Entity<RefreshToken>()
      .HasAlternateKey(c => c.Token)
      .HasName("refreshToken_Token");

    base.OnModelCreating(builder);
  }
}
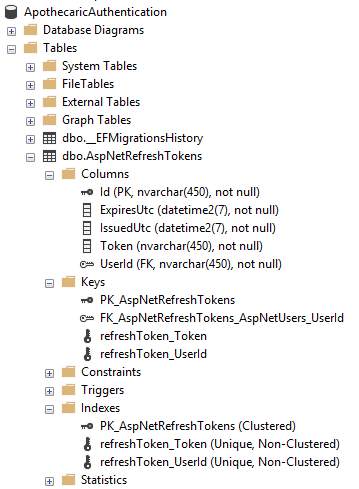
Back in our ApothecaricDbContext, we add the DbSet for RefreshToken on line 7. I also want to create an index on both the Token field and the UserId field to help with look ups. On lines 19 – 25 we add the code to create the indexes on our AspNetRefreshTokens table.
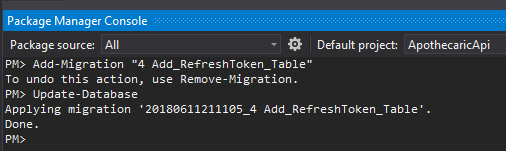
Another Migration
We need to now create a new Migration and update the database with the new table.
And here is our new table and the indexes that we wanted.
More Code
After that, we need to create a new type of object to return from our calls to get a new Auth Token and when we will call to Refresh that token. I have created a new “response” object called TokenResponse. I will send this object back instead of just the plain Auth token.
1
2
3
4
5
6
7
8
9
10
11
12
13
14
public class TokenResponse
{
  public string AccessToken { get; set; }

  public string RefreshToken { get; set; }

  public string FirstName { get; set; }

  public string LastName { get; set; }

  public string TenantCode { get; set; }

  public DateTime TokenExpiration { get; set; }
}
In our TokenResponse class we will hold both our Auth Token (AccessToken) and our Refresh Token. Just for fun, I will also return the User’s First and Last Name, along with their Tenant Code. We could return some claims, outside of the Auth Token here also if we needed the Api Caller to have access to additional information. Last, we will eventually need an easy way to check the expiration of our Auth Token on the client.
When we create our client app, the client can make Api calls and try to call the Refresh Token when the client gets an error back from an Api call or we can check for expiration and knowingly call the Refresh Token after we know the Auth Token has expired. I like this second approach much better!
Update Our Original Token Call
We will need to update our GetToken controller method to create and store a new Refresh Token and then send that Refresh Token back to the client, along with the Auth Token via our TokenResponse object.
Let’s look at the updated GetToken method: Disclaimer: The code here is for illustration purposes. Never put all this code into one method…or all that functionality in a controller!)
1
2
3
4
5
6
7
8
9
10
11
12
13
14
15
16
17
18
19
20
21
22
23
24
25
26
27
28
29
30
31
32
33
34
35
36
37
38
39
40
41
42
43
44
45
46
47
48
49
50
51
52
53
54
55
56
57
58
59
60
61
62
63
64
[HttpPost]
[AllowAnonymous]
[ApiValidationFilter]
[Route("Token")]
public async Task<IActionResult> CreateToken([FromBody] LoginViewModel login)
{
  var user = await userManager.FindByNameAndTenantAsync(login.Email, Tenant.Id);

  if (user != null)
  {
    var result = await signinManager.CheckPasswordSignInAsync(user, login.Password, false);

    if (result.Succeeded)
    {

      var refreshDbToken = dbContext.RefreshTokens.SingleOrDefault(t => t.UserId == user.Id);

      if (refreshDbToken != null)
      {
        dbContext.RefreshTokens.Remove(refreshDbToken);
        await dbContext.SaveChangesAsync();
      }

      var newRefreshToken = new RefreshToken
      {
        UserId = user.Id,
        Token = Guid.NewGuid().ToString(),
        IssuedUtc = DateTime.Now.ToUniversalTime(),
        ExpiresUtc = DateTime.Now.AddMinutes(5)
      };

      dbContext.RefreshTokens.Add(newRefreshToken);
      await dbContext.SaveChangesAsync();

      var key = new SymmetricSecurityKey(Encoding.UTF8.GetBytes(configuration["Tokens:Key"]));
      var creds = new SigningCredentials(key, SecurityAlgorithms.HmacSha256);
      var nowUtc = DateTime.Now.ToUniversalTime();
      var expires = nowUtc.AddMinutes(double.Parse(configuration["Tokens:ExpiryMinutes"])).ToUniversalTime();

      var token = new JwtSecurityToken(
        configuration["Tokens:Issuer"],
        configuration["Tokens:Audience"],
        null,
        expires: expires,
        signingCredentials: creds);

      var response = new TokenResponse
      {
        AccessToken = new JwtSecurityTokenHandler().WriteToken(token),
        RefreshToken = newRefreshToken.Token,
        FirstName = user.FirstName,
        LastName = user.LastName,
        TenantCode = Tenant.Code,
        TokenExpiration = token.ValidTo
      };

      return Ok(response);
    }

    return BadRequest();
  }

  return BadRequest();
}
There is a few more things going on in there now than just Authenticating the User. We still start by finding our user in the database (line 7). If we do have a user, we call Core’s SignInManager and check that the User can be signed in. Should that work, we will grab the RefreshToken, in the database, that may be tied to our user. If the user is signing in for the very, very, very first time, it is likely that there would be no initial token in the database for them. If we do have a RefreshToken, we kill it off by removing it from the database since we are really signing in and not refreshing at this time.
We then move on to creating a RefreshToken. For this example, I will just use a GUID for the Refresh Token. The RefreshToken will consist of a User ID, the Token (or GUID in this case), the time the token was issued and the time that the token will expire. I know most times you don’t have refresh tokens expire, but in my case, I would keep the user logged in and able to refresh for a 12 hour period. After that, I would want to force the user to have to log in again. Remember, the Auth Tokens have a much shorter expiration time.
After creating our RefreshToken, the next set of code creates our Jwt (Auth) Token just like it did earlier. No change here.
On line 47 we will create a new response object to send back to the client. This way we can send back the Auth Token and the Refresh Token…along with a few other pieces of information.
How About A Refresh Endpoint?
1
2
3
4
5
6
7
8
9
10
11
12
13
14
15
16
17
18
19
20
21
22
23
24
25
26
27
28
29
30
31
32
33
34
35
36
37
38
39
40
41
42
43
44
45
46
[HttpPost]
[AllowAnonymous]
[ApiValidationFilter]
[Route("Token/Refresh")]
public async Task<IActionResult> RefreshToken([FromBody] RefreshToken refreshToken)
{
  var refreshTokenFromDatabase = dbContext.RefreshTokens
                                     .Include(x => x.User)
                                     .SingleOrDefault(i => i.Token == refreshToken.Token);

  if (refreshTokenFromDatabase == null)
    return BadRequest();

  if (refreshTokenFromDatabase.ExpiresUtc < DateTime.Now.ToUniversalTime())
    return Unauthorized();

  if (!await signinManager.CanSignInAsync(refreshTokenFromDatabase.User))
    return Unauthorized();

  if (userManager.SupportsUserLockout && await userManager.IsLockedOutAsync(refreshTokenFromDatabase.User))
    return Unauthorized();

  var key = new SymmetricSecurityKey(Encoding.UTF8.GetBytes(configuration["Tokens:Key"]));
  var creds = new SigningCredentials(key, SecurityAlgorithms.HmacSha256);
  var nowUtc = DateTime.Now.ToUniversalTime();
  var expires = nowUtc.AddMinutes(double.Parse(configuration["Tokens:ExpiryMinutes"])).ToUniversalTime();

  var token = new JwtSecurityToken(
    configuration["Tokens:Issuer"],
    configuration["Tokens:Audience"],
    null,
    expires: expires,
    signingCredentials: creds);

  var response = new TokenResponse
  {
    AccessToken = new JwtSecurityTokenHandler().WriteToken(token),
    RefreshToken = refreshTokenFromDatabase.Token,
    FirstName = refreshTokenFromDatabase.User.FirstName,
    LastName = refreshTokenFromDatabase.User.LastName,
    TenantCode = Tenant.Code,
    TokenExpiration = token.ValidTo
  };

  return Ok(response);
}
This one is not quite as bad. First, we get the RefreshToken from the database. Most times you would send in just the Token part of the refresh token here, like this:
1
2
3
{
  "token": "2306ef0f-58b8-4ead-a573-712071777c23"
}
Validation
The ApiValidationFilter will ensure that the Token is present, otherwise an error message will be send back to the client telling them that the Token piece is missing and required.
Existing Token Checks
The next few lines we check to see if we should reject the Refresh Token here. If we don’t get a match in the database, then send back an Unauthorized message. We can also check if our Refresh Token has expired, this would force the User to have to log in again. Remember, Refresh Tokens can have very long expiry times. Should you notice any funny business in the requests to your Api’s at all, you can go in to the database and either expire the RefreshToken or delete it altogether. Last check is just some built-in Core Identity checks. I have not really implemented the lockout piece so this should not trigger in our example.
If we made it past all that we should then create a new Auth (Jwt) Token and send this new token, along with our same RefreshToken, back to the client. The client should now use the new enclosed Auth Token to make Api calls.
Checking Out the Api Calls
First call would be to get the Auth Token.

We can now use the accessToken to make our test calls.
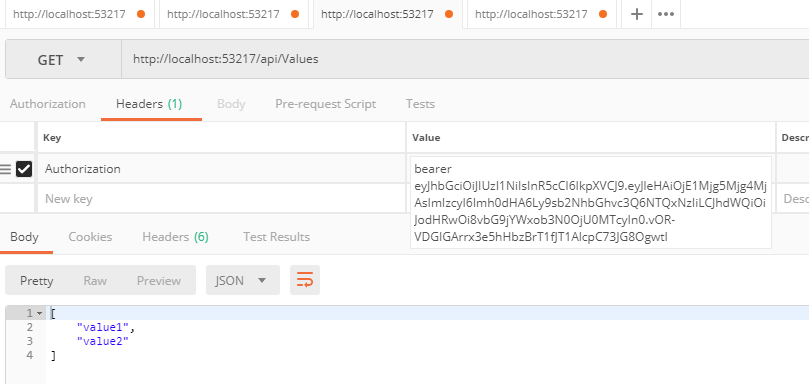
I have my Auth Token to expire in 1 minute. After that, this Api call will give me an Unauthorized error. At that point, I call the Refresh and send in my RefreshToken.
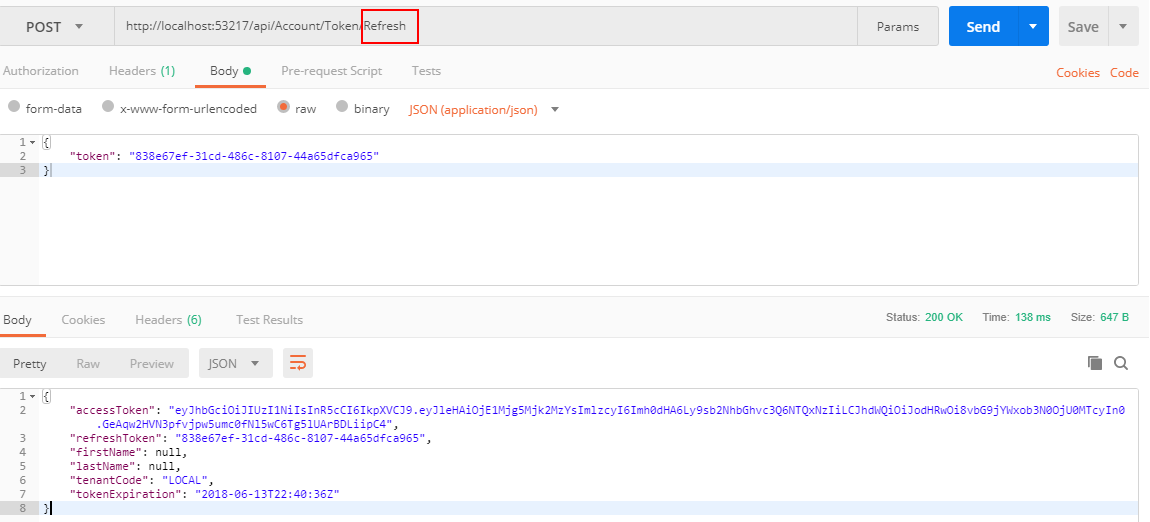
From here, you now use the Auth Token (accessToken) from the Refresh call to make your Api calls and your call to api/Values will work with the new Auth Token.
Next Steps
Next I would like to create a small Angular UI that would log in a User and show some type of list page. That way we can show a User getting to another page in the app upon login and maybe being brought back to a login page if the RefreshToken expires. We will also look Angular’s HttpIncerceptor. In here we can check the expiration of our Auth Token before making our Api call and then call a Refresh if we need it.
Hope to see you then!