
Let’s now get XCP-ng configured and ready to create some VM’s.
<< PREVIOUS: Install XCP-ng On An Extra Server
Remember from when I installed my version of XCP-ng, I had set my installation’s IP address to 192.168.86.50. In order to get to your new installation/server, enter that IP address into a browser on another computer and you will be taken to a start page for your XCP-ng server.
XCP-ng Start Page
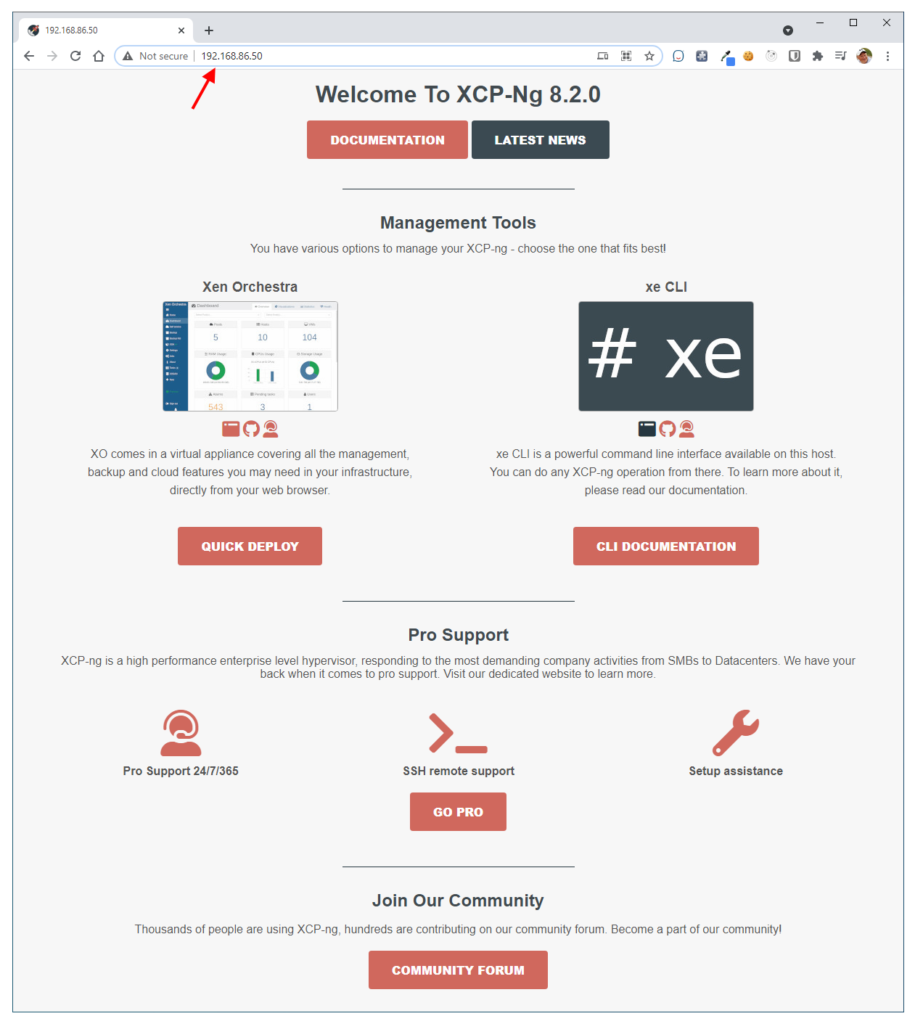
From here, you can install the CLI or Xen Orchestra. If you deploy Xen Orchestra, note that you will only be installing a limited installation of the Xen Orchestra tool.
I am going to install the whole Xen Orchestra package on a VM that we are about to create. The full version of Xen Orchestra is a paid license, but I will be installing the package from source. This installation can be used for free and for evaluation purposes. If you go this route, you will have to reinstall the software if you want to keep your installation up to date. This free package does not have the feature to upgrade or update the software.
XCP-ng Center
In order to get our first VM out there so that we can eventually install Xen Orchestra, I will use the the XCP-ng Center application. The latest releases for this application are here. This is a community sponsored application. It does not have all the power that Xen Orchestra does, but it is able to get us started.
Note: If we weren’t going to worry about installing the full and complete version of Xen Orchestra, you could always use the Quick Deploy that we saw earlier when we navigated to the IP address of our new XCP-ng server.
Once you are at the releases page for XCP-ng Center, scroll to the bottom of the latest release section and download the msi file.
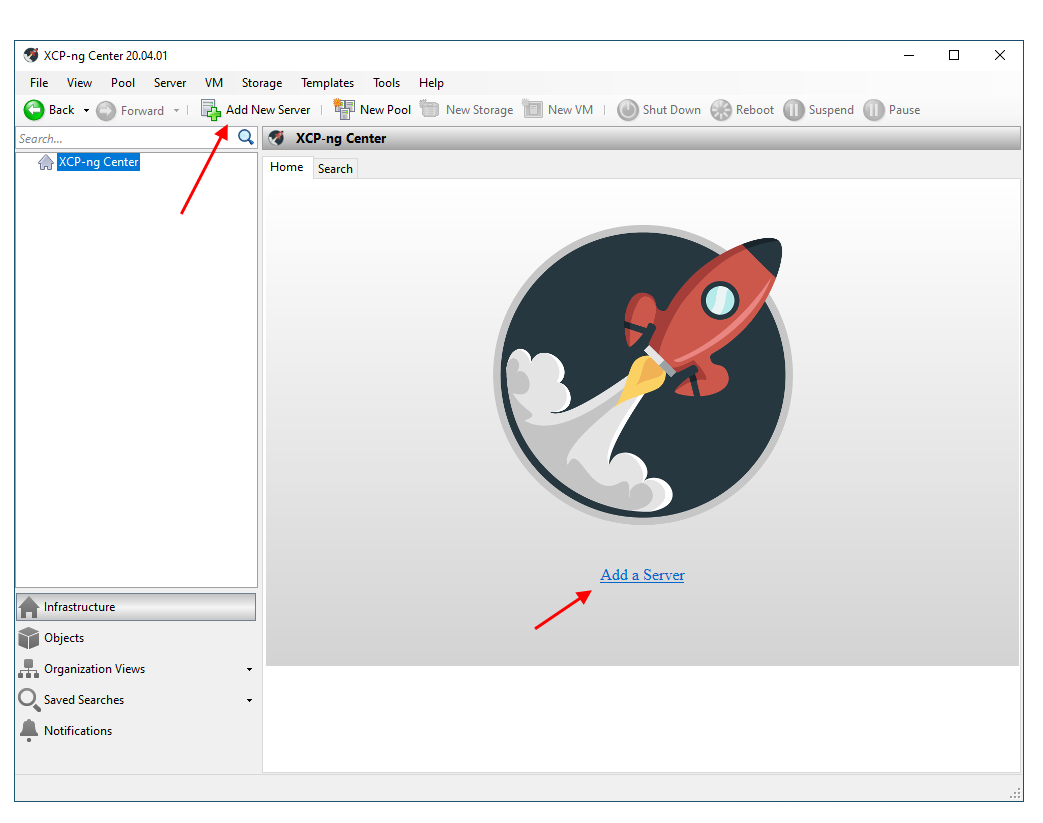
Add XCP-ng Server
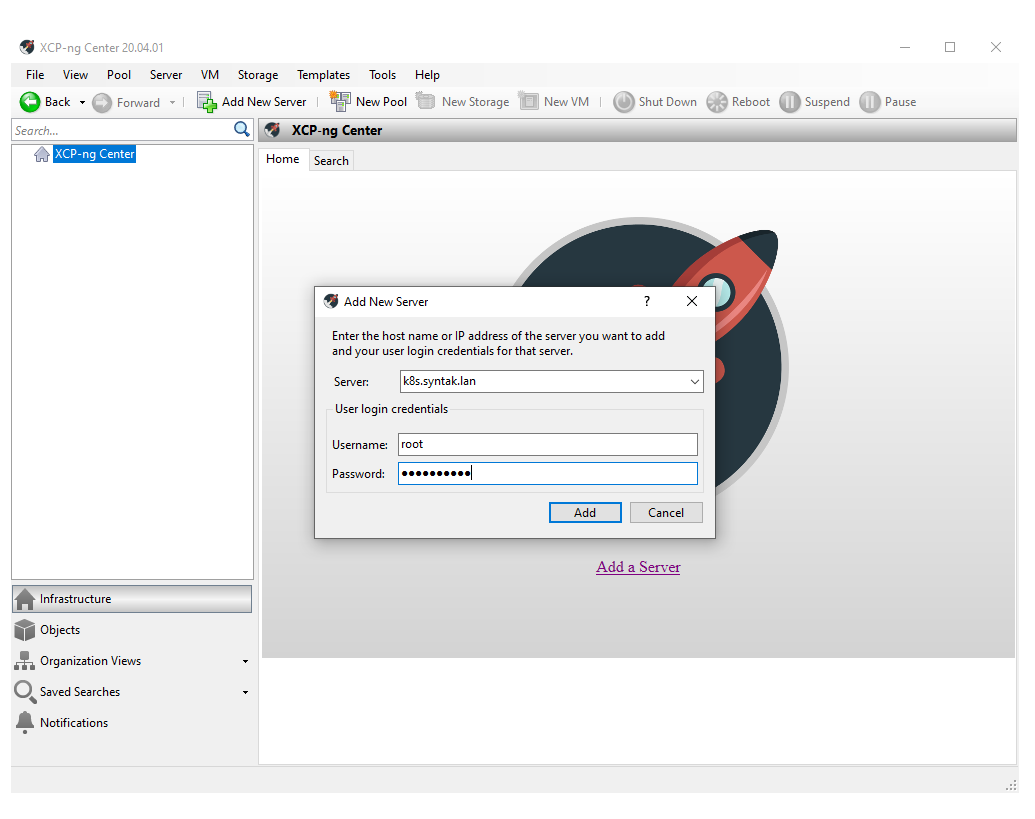
Once the application is installed, open it up and look for the “Add a Server” link on the application’s homepage. Click that and we will start to link to our XCP-ng server.
You should be able to see your server in the Server: dropdown list. If you don’t, you can always type in the IP address of our server. In my case, because I run a local DNS server, I have my IP address of 192.168.86.50 resolving to k8s.syntak.lan which is what you see in the image below.
The Username: of “root” should be filled in for you already. Since we did not specify a different user for your server, we can just use root. Remember, this is just for local testing and learning. We would not use the root user like this in production.
And now fill in the password that you entered in when we installed the XCP-ng software and set up the server.
Create A Directory For ISO Files
We are going to switch gears here a little and ssh into our server also. We need to create a directory on the server and share that directory so that our XCP-ng Center application can see this new directory.
Because I want to create my VM’s using Ubuntu Server, I will need to create a directory on the server where I can store the ISO file that the software will use to create our VM’s. It looks like there are some ISO configurations already noticed by the application, but not Ubuntu Server.
A great tool for ssh-ing into Linux machines is MobaXterm. I use the free version for my home lab. Once you have your favorite ssh tool installed (or you may already have one installed), ssh into the XCP-ng server.
In the server, use the mkdir command to create a new directory. I am going to call my new directory “ISO” and I will place that in the /var/opt directory.
1
2
3
mkdir /vat/opt/ISO
cd /var/opt
ls
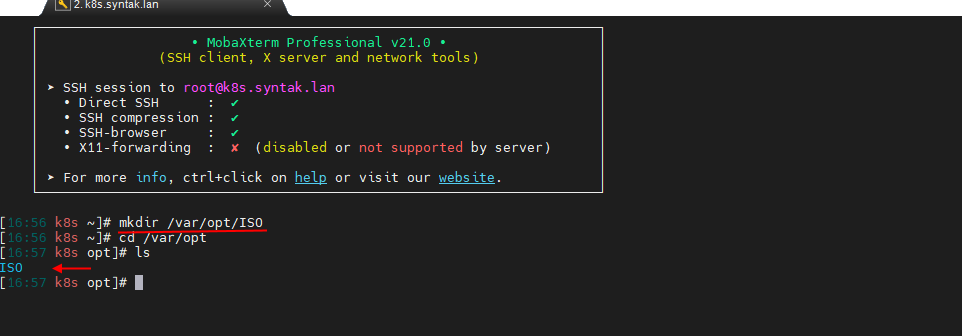
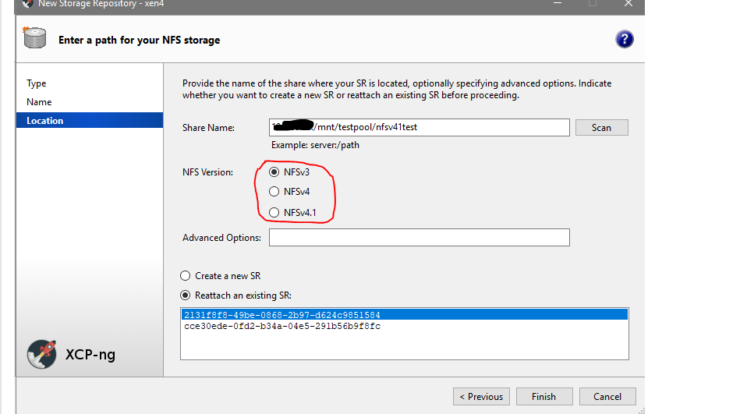
If we travel to the opt directory and to a listing on the contents, we should see our new “ISO” directory. The next step is to set some properties on this new directory in order for the XCP-ng Center application to see our directory. We will use an “xe” CLI call to make the changes we need.
1
xe sr-create name-label=ISO type=iso device-config:location=/var/opt/ISO device-config:legacy_mode=true content-type=iso

We are telling XCP-ng that our new directory will house iso type files. We will be able to use files in here to build our our VM’s.
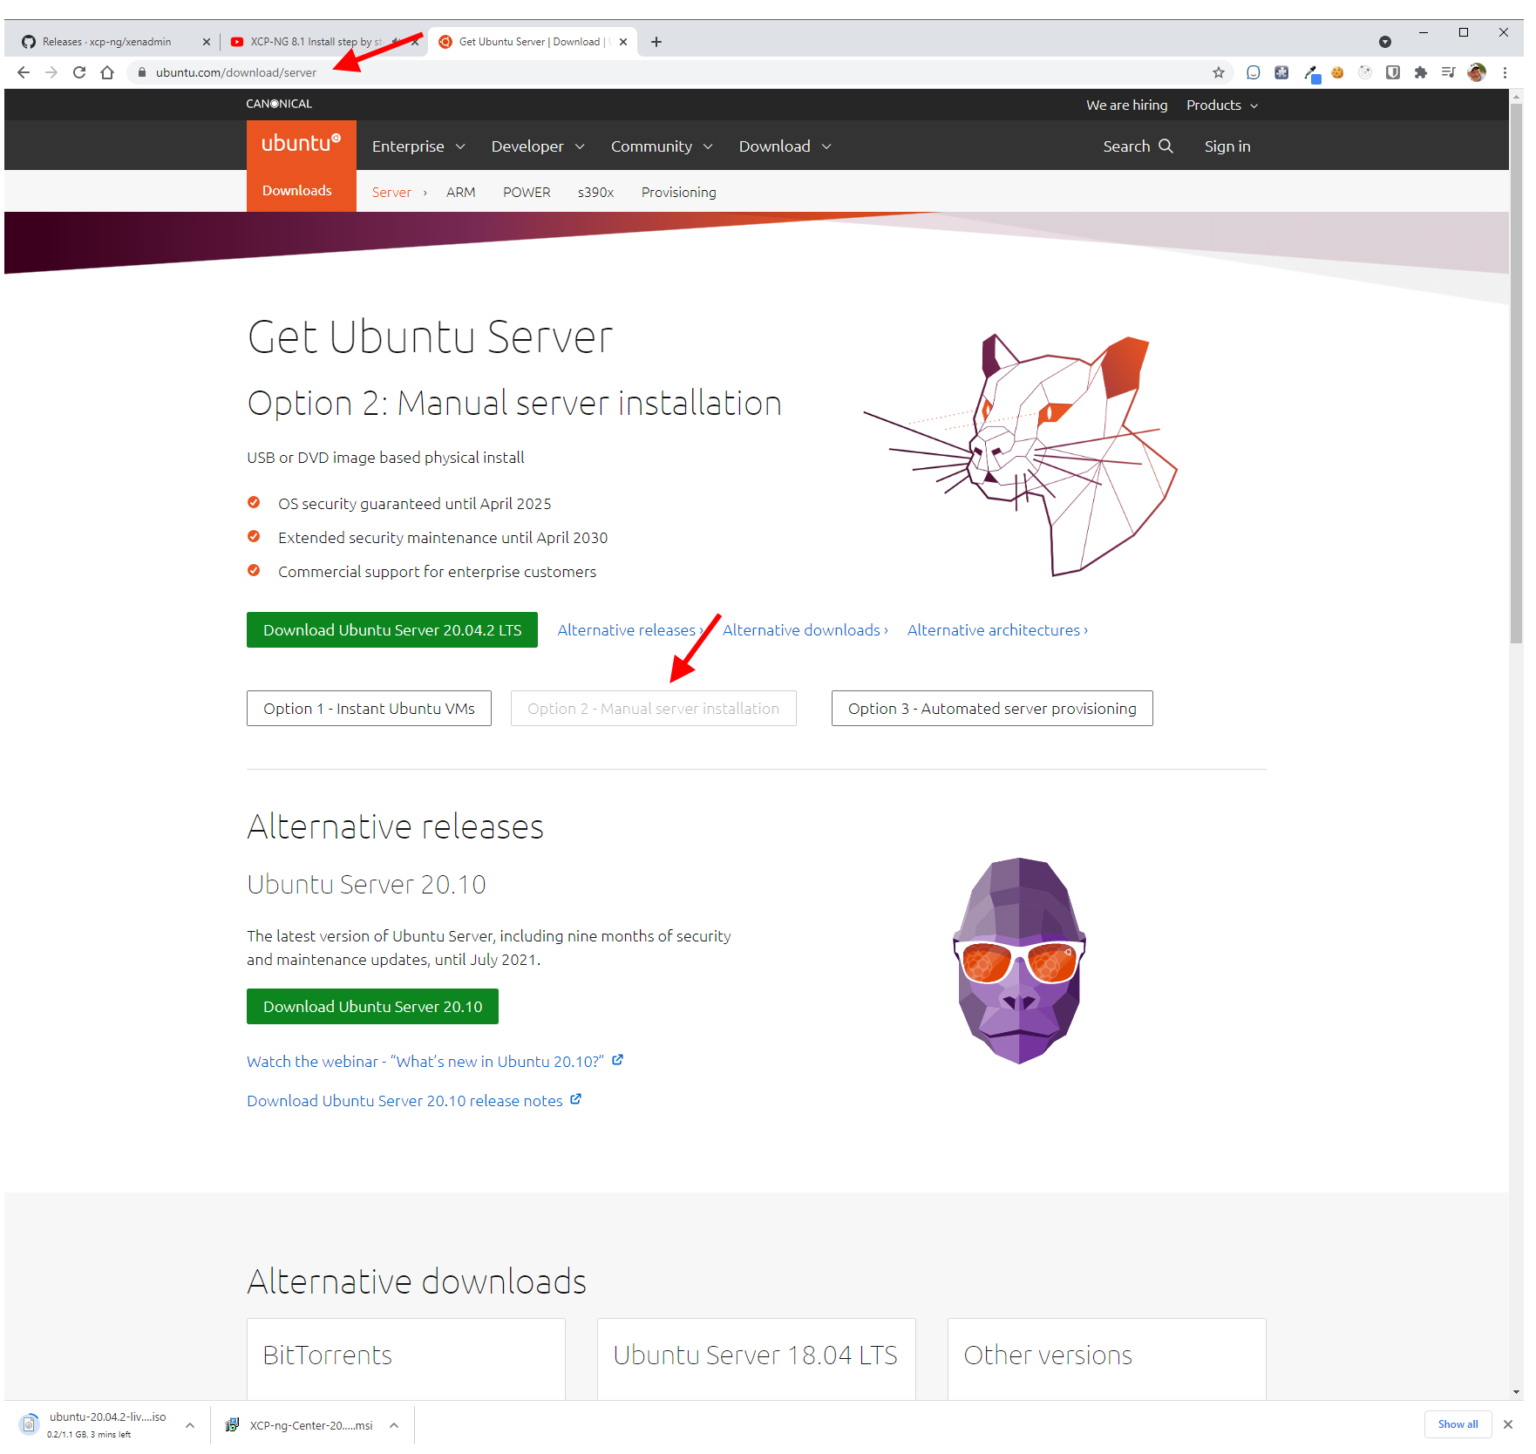
I have downloaded the Ubuntu Server iso from https://ubuntu.com/download/server and selected the Manual server installation. This will download the ISO file for you.
Getting ISO Files To The Server
In order to copy the Ubuntu Server ISO file to my XCP-ng server, I will go back to my MobaXterm application and copy my the ISO file to my /var/opt/ISO directory. Using the MobaXterm app allows me to not only ssh into the server, but also use the application like an ftp application also.
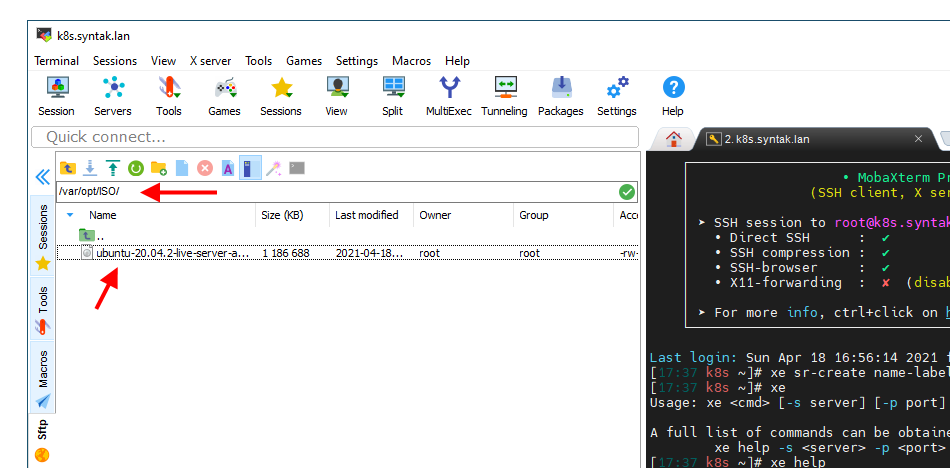
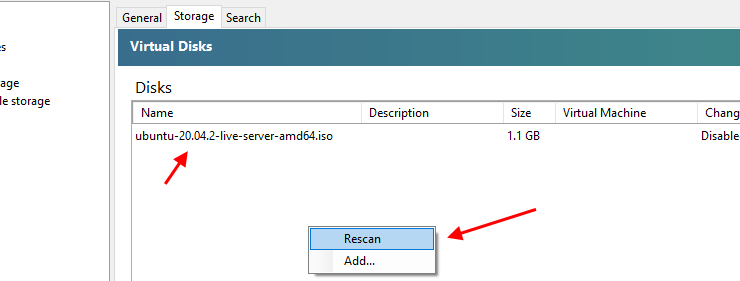
When you go back into the XCP-ng Center application, you will notice that our ISO directory now shows up under or server name. All you have to do in order for the XCP-ng application to see the new iso file now is to click on our directory and go into the empty space under the Storage tab and right-click to open the context menu. Choose rescan and our Ubuntu Server ISO image will appear!
Next Time
On the next installment, we will look at creating our first VM on XCP-ng and using that VM to host our Xen Orchestra installation.
Stay tuned and Hope to see you there!
>> Next: Xen Orchestra – Set Up